The Calendar scheduling tool can assist you with finding the next-available free times and meeting locations across your organization. You can set up preferences for preferred meeting times, buildings, location and room size.
As you enter attendee names, the scheduling tool begins to suggest times and locations in the Overview pane. You also have the option to look for a location for your meeting before adding attendees. If you set up your location preferences, only these locations are displayed.
The scheduling tool is enabled by default to automatically display attendee and location availability as soon as you enter the first attendee name in the Attendee field. In the Suggestion Preferences dialog, you can change the default to manual and configure other scheduling preferences to manage what is displayed.
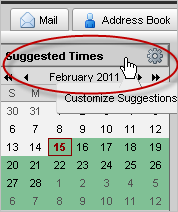
When working in Calendar, click the Suggested Times heading in the Calendar Overview pane to open the Suggestion Preferences dialog.

Configure the following options:
Suggestions. The options are Automatic (default) or Manual.
When Automatic is selected, as you start to enter text in the Attendees field, the Calendar Overview pane displays suggest times and locations in 30 minute intervals.
To display the attendee time and locations manually, select Manual. When you want to see the attendee/location information, click Show Suggestions for (date) in the Suggested Times area.
Location Preferences. In this section, you can define what type of locations you want included in your search. Leave this section blank if you have no location preferences.
In the name field you can enter a partial location name and locations with that string in the name are included in the search. For example, Rooms in building 3 include "Bldg3" in their location name. If you add "Bldg3" in the Name field, only locations that have "Bldg3" in the name will be suggested.
If you do not want locations to be suggested with attendee availability, uncheck Suggest available rooms.
Time Preferences. You specify which hours should be included in the search for attendees availability.
My Working Hours Only. Searches only for times that meet your configured working hours. This is the work week and hours you set in your Calendar preferences.
All Attendee Working Hours. When searching for a location it takes into consideration everyone's working hours. Note: If you include attendees from different time zones, especially those that are many time zones away, you will never be able to find a location to accommodate all attendees. In this case, the suggestion panel does not show any location resources.
Non-Working Hours. This search schedules for hours that are not marked as working, such as evenings and weekends.
If you want to see only times and locations when all attendees are available , you can check the box Show only the times when all attendees are available.
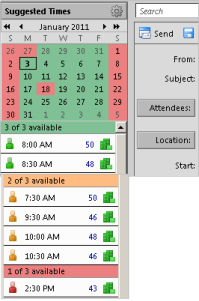
When you schedule meetings, you can check to see when attendees are busy or free so you can find a good time for all attendees to meet. As you add attendees to the Attendees field, a suggestion panel in the Overview pane shows availability in 30 minute time slots for the attendees and for at least one room (location). The number on the right of the time is the number of locations that are available for this time. You can click this number to see a list of suggested locations and to select a location. The selected location is added to the Location field on the appointment page.
Note: Room locations are displayed if they have been configured in the company directory.
The mini-calendar suggests attendee availability by color code.
Green means that all attendees and at least one location is available for those days.
Orange means that not everyone can attend but more than half can and at least one location is available. You can hover the cursor over the date to see the names of up to 10 people who are not available.
Red means that more than half of the attendees cannot attend the meeting on those days.
In the example below, all attendees are available all month except for January 18. Less than half are available on that date.

To select a suggested time, click on the row. The Start and End time fields on the appointment page are updated.
To select a location, click on the number in the row with the suggested time. Select a location from the list that is displayed. The location is added to the Location field.